

Soft Apple Slice Bars with Cinnamon and Nutmeg – Chicago Bakery Style

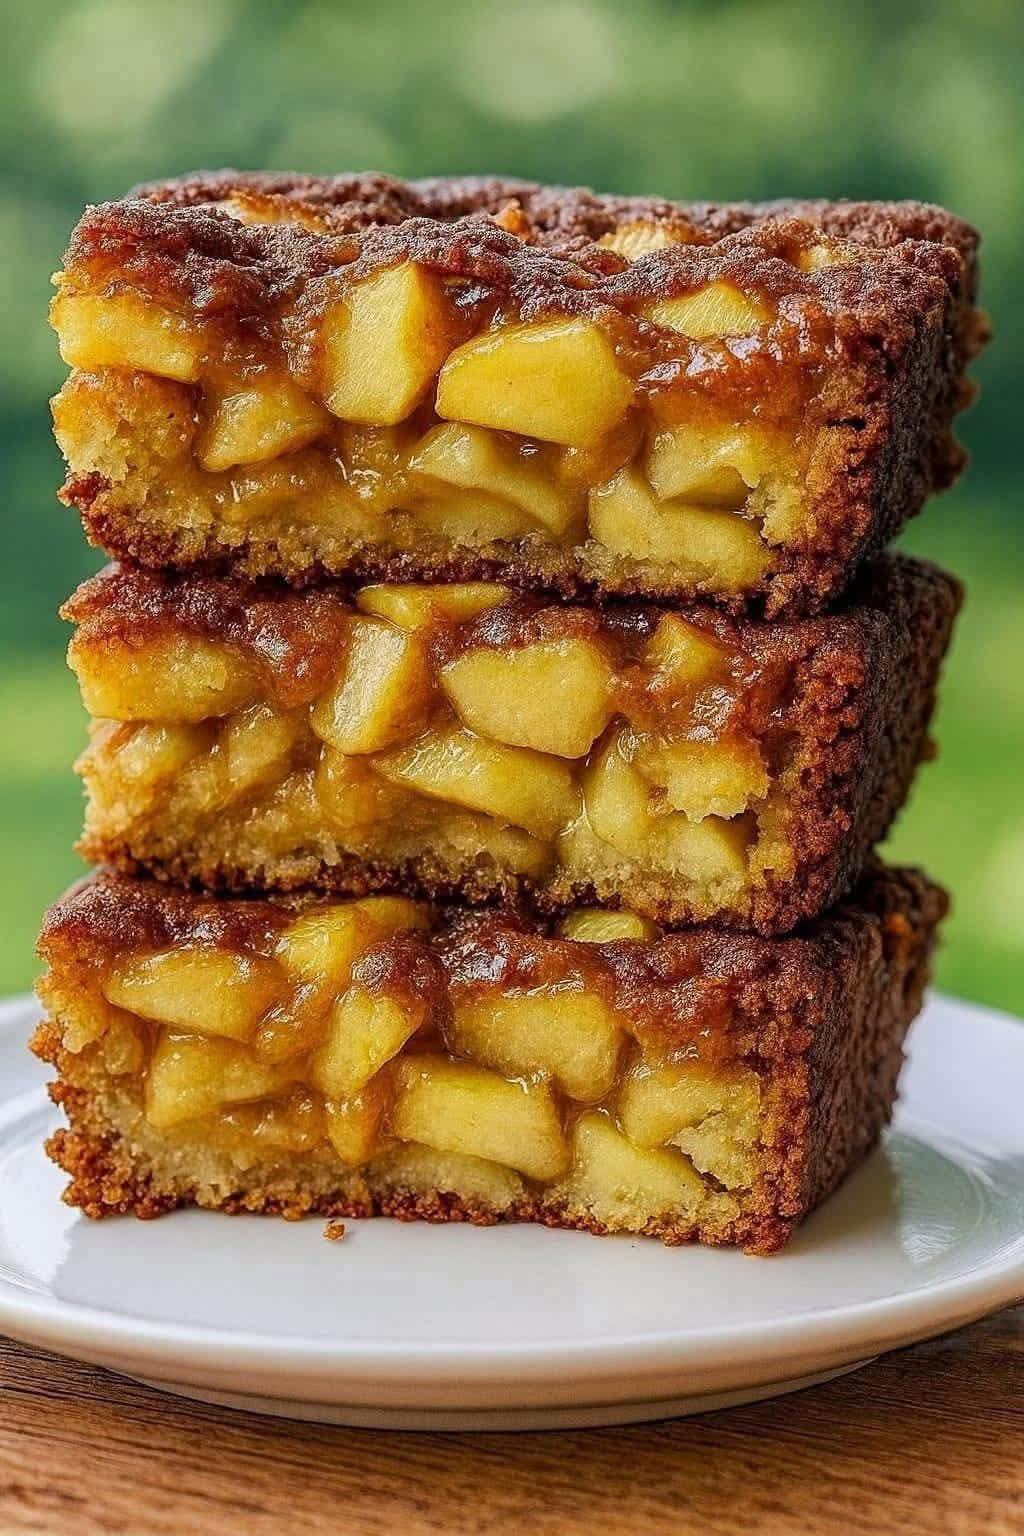
Soft, bakery-style apple slices baked with cinnamon and nutmeg, filled with tender apple pieces and lightly dusted with powdered sugar.
Printable Recipe Card
Soft Apple Slice Bars with Cinnamon and Nutmeg – Chicago Bakery Style
Soft, bakery-style apple slices baked with cinnamon and nutmeg, filled with tender apple pieces and lightly dusted with powdered sugar.
15 minutes
45 minutes
60 minutes
9 servings
dessert
Not listed
9 servings
320 calories
Ingredients
- 2 large apples, peeled, cored, and sliced
- 1 cup all-purpose flour
- 1/2 cup granulated sugar
- 1/4 cup brown sugar, packed
- 1 teaspoon baking powder
- 1/4 teaspoon salt
- 1/2 cup unsalted butter, melted
- 1 large egg
- 1 teaspoon vanilla extract
- 1/2 cup milk
- 1 teaspoon ground cinnamon
- 1/4 teaspoon ground nutmeg
- Powdered sugar for dusting (optional)
Instructions
- Preheat the oven to 350°F (175°C) and grease a 9x9-inch baking pan.
- In a large bowl, whisk together flour, granulated sugar, brown sugar, baking powder, salt, cinnamon, and nutmeg.
- In another bowl, whisk melted butter, egg, vanilla extract, and milk until smooth.
- Pour the wet ingredients into the dry ingredients and stir until just combined.
- Gently fold in the sliced apples until evenly coated with batter.
- Spread the batter evenly into the prepared baking pan.
- Bake for 40 to 45 minutes until the top is golden and a toothpick inserted in the center comes out clean.
- Allow to cool slightly, dust with powdered sugar if desired, then cut into squares and serve.
Nutrition
Chicago-Style Bakery Apple Slices
If you’ve ever walked into a neighborhood bakery in Chicago, you’ve probably seen the famous apple slices sitting behind the glass case. Soft, lightly spiced, and filled with tender apples, these simple dessert bars are a beloved Midwest classic.
This Chicago-Style Bakery Apple Slices recipe recreates that nostalgic treat at home. The batter bakes into a soft, cake-like bar packed with cinnamon, nutmeg, and sweet apple pieces. A light dusting of powdered sugar finishes the dessert with that authentic bakery-style look.
These apple slices are perfect for coffee breaks, brunch tables, or simple family desserts, and they’re incredibly easy to make with everyday pantry ingredients.
Why I Love This Recipe
There’s something comforting about a classic bakery dessert like this one.
First, the texture is wonderfully soft and tender, almost like a cross between cake and blondies.
Second, the apples provide bursts of natural sweetness and moisture throughout every bite.
Finally, the recipe is incredibly simple and reliable, making it perfect for beginner bakers and busy home cooks alike.
I especially love serving these apple slices alongside brunch favorites like Classic French Toast – The Golden Breakfast Everyone Loves.
Tips for Success
Use thin apple slices
Thin slices cook more evenly and distribute better throughout the batter.
Don’t overmix the batter
Overmixing can make the bars dense instead of soft.
Line the pan with parchment paper
This makes removing and slicing the bars much easier.
Cool before cutting
Allowing the bars to cool helps them hold their shape.
Serving Suggestions and Pairings
These apple slices are perfect as a dessert or sweet brunch treat.
Serve them alongside breakfast favorites like Fluffy Buttermilk Pancakes – The Secret to a Perfect Breakfast Stack for a cozy weekend brunch.
They also pair beautifully with simple baked goods such as Moist 1-Bowl Banana Bread – The Easy Recipe That Never Fails for a comforting dessert spread.
For busy mornings, easy breakfast ideas like The Ultimate Overnight Oats Guide – 1 Base Recipe, 6 Easy Flavors make a great complement to these sweet bars.
Nutritional Information (Per Serving)
Approximate values:
- Calories: 320
- Fat: 14 g
- Carbohydrates: 45 g
- Protein: 4 g
These bakery-style apple slices are a satisfying treat that’s perfect for sharing.
Storage and Leftover Tips
These apple bars store well and taste great even the next day.
Room temperature
Store in an airtight container for up to 2 days.
Refrigerator
Refrigerate for up to 5 days.
Freezer
Freeze slices individually for up to 2 months.
Reheating tip
Warm slightly in the microwave for a fresh-from-the-bakery taste.
More Recipes You’ll Love
If you enjoy cozy baked treats like these apple slices, try these favorites:
- Moist 1-Bowl Banana Bread – The Easy Recipe That Never Fails
- Classic French Toast – The Golden Breakfast Everyone Loves
- Fluffy Buttermilk Pancakes – The Secret to a Perfect Breakfast Stack
- The Ultimate Overnight Oats Guide – 1 Base Recipe, 6 Easy Flavors
- Make-Ahead Breakfast Burritos – The Freezer-Friendly Morning Game Changer
These recipes make it easy to build a delicious menu of breakfast and dessert favorites.
Final Thoughts
These Chicago-Style Bakery Apple Slices capture the charm of a classic neighborhood bakery treat. Soft, warmly spiced, and filled with tender apple pieces, they’re the perfect dessert for cozy gatherings, coffee breaks, or weekend baking.
Simple ingredients, nostalgic flavor, and easy preparation make this recipe one you’ll come back to again and again.
If you give this recipe a try, I’d love to hear how it turned out. Share your thoughts, leave a comment, and follow along for more delicious recipes from Jason Griffith at Chef Maniac.
Why You?ll Love This Recipe
This Soft Apple Slice Bars with Cinnamon and Nutmeg – Chicago Bakery Style is built for home cooks who want a reliable dessert without turning dinner or dessert into a project. The ingredient list stays approachable, the method is clear, and the finished dish gives you the kind of comfort-food payoff that makes a recipe worth saving.
Because the recipe card below keeps the exact measurements and steps organized, this article focuses on the practical details that help the recipe come out better: timing, texture, ingredient choices, storage, serving ideas, and simple ways to adjust the flavor for your table.
Tips for the Best Results
Use the listed times as a guide, but remember that cookware, appliance strength, ingredient size, and starting temperature can all affect the final result. This recipe lists 15 minutes of prep time, 45 minutes of cook time, and about 60 minutes total time, which makes it easier to plan around dinner, parties, or weekend cooking.
Season thoughtfully. Many comfort-food recipes use flavorful packaged ingredients, cheese, sauces, or seasoning blends, and those can vary in salt level. Taste when it is safe to do so, then adjust at the end. A small amount of acid, fresh herbs, black pepper, or a creamy topping can make the finished dish feel more balanced.
Easy Variations
You can adapt this recipe based on what your family likes. Keep the main method the same, then change the seasoning, topping, vegetable, or serving style. If you want more heat, add a spicy element. If you want something milder, reduce strong seasonings and finish with a creamy or fresh topping.
For a heartier version, serve it with a simple side such as rice, potatoes, salad, bread, or roasted vegetables. For a lighter version, pair it with crisp greens or fresh fruit, depending on whether the recipe is savory or sweet.
Storage and Reheating
Store leftovers in an airtight container in the refrigerator once the food has cooled. Most cooked dishes keep well for three to four days, while many desserts keep best when covered tightly so they do not dry out.
Reheat gently when possible. A microwave is convenient for individual portions, but an oven, skillet, or air fryer can help bring back texture when the recipe has a crisp, baked, or toasted element.
What to Serve With It
This recipe makes 9 servings, so it can work as a main dish, side, dessert, or shareable recipe depending on the category. For savory recipes, pair it with something fresh or simple so the meal does not feel too heavy. A salad, roasted vegetable, bread, rice, or potatoes can round out the plate.
For sweeter recipes, serve smaller portions with coffee, milk, whipped cream, fresh fruit, or a simple scoop of vanilla ice cream. The goal is to support the main flavor rather than cover it up.
Food Safety and Doneness
Use visual cues and safe cooking temperatures when judging doneness. For meat, poultry, seafood, and egg-based recipes, an instant-read thermometer is the most reliable tool. You can review official guidance on the USDA safe minimum internal temperature chart.
For baked goods and desserts, look for the texture cues in the recipe card: set centers, golden edges, clean tester marks, or proper chilling time. Letting a recipe rest before serving often improves texture and makes slicing or plating easier.
Food Safety Source
For safe cooking temperatures and food handling basics, see the USDA safe minimum internal temperature chart.
Frequently Asked Questions
Can I make Soft Apple Slice Bars with Cinnamon and Nutmeg – Chicago Bakery Style ahead of time?
You can usually prepare some parts ahead of time, but follow the storage and reheating notes in the recipe for the best texture and food safety.
How should I store leftovers?
Store leftovers in an airtight container in the refrigerator. Use the storage instructions on this page when available, and reheat gently until hot.
Can I change the ingredients?
Yes. Most home-style recipes can be adjusted for taste, but keep the core cooking method and safe internal temperatures in mind when changing proteins or cook times.
More Recipes You'll Love
5 Easy Dessert Recipes for Cakes, Cupcakes, Brownies, and Pies
Five easy dessert recipes worth saving, from soft apple cake and lemon cupcakes to homemade donuts, brownie-bottom chees
View Recipe
The Best Swedish Apple Cake Recipe (Soft and Buttery)
A soft, buttery Swedish apple cake topped with cinnamon-sugar apples and baked until golden and tender.
View Recipe
Bakery-Style Lemon Cupcakes with Homemade Lemon Curd Center
Soft lemon cupcakes filled with homemade lemon curd and topped with creamy lemon cream cheese frosting.
View Recipe
Fluffy Homemade Donuts You Can Fry in 40 Minutes
Soft homemade donuts that can be served as classic ring donuts dipped in syrup and coconut or filled with whipped cream.
View Recipe